
IMPORTANT: Please follow each step carefully. Each one includes a screenshot to help you.
Step 1: Download the Installer
Download Office 2024 using one of the links below:
64-bit version (recommended for most users):
https://uk.getrenewedtech.com/Downloads/Office_2024_EN_64Bits.exe32-bit version (for older systems or better compatibility with certain add-ins):
https://uk.getrenewedtech.com/Downloads/Office_2024_EN_32Bits.exe
Note: Use the 32-bit version if you’re running a 32-bit version of Windows or if you rely on legacy Office add-ins that are only compatible with 32-bit Office.
Step 2: Start Installation
Click Install.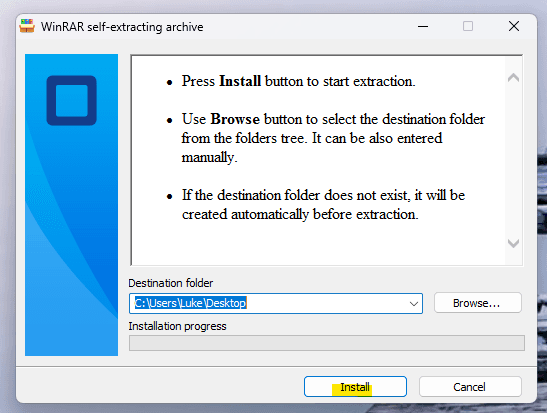
Step 3: Confirm Installation
When prompted by Windows, click Yes.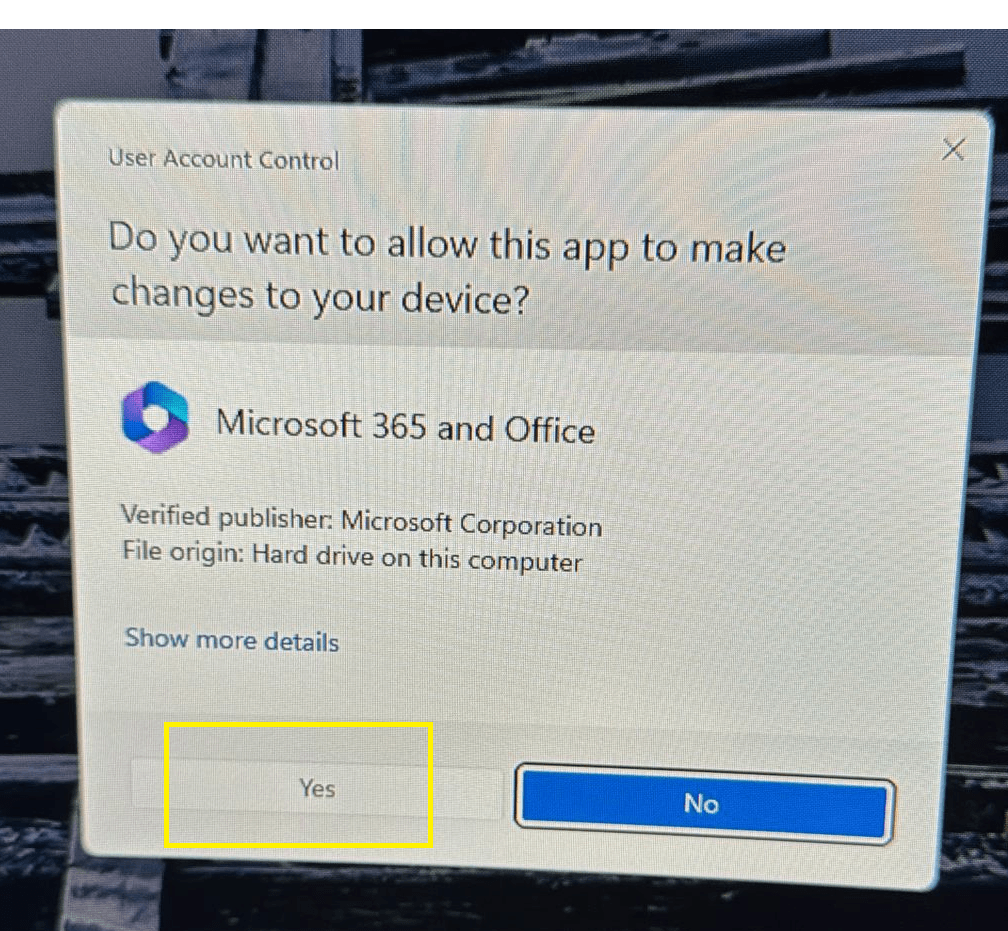
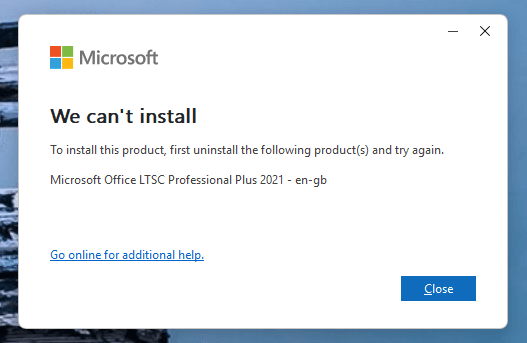
Step 4: (Optional) Uninstall Old Office
If you see a message about an old version, uninstall it:
- Press the Windows key or click the search bar
- Type Control Panel and open it
- Select Programs > Programs and Features
- Select your old Office version and click Uninstall
- Follow on-screen steps, then restart from Step 1
Step 5: Wait for Installation to Complete
It may show “Microsoft 365”. That’s normal — it will show Office 2024 once activated.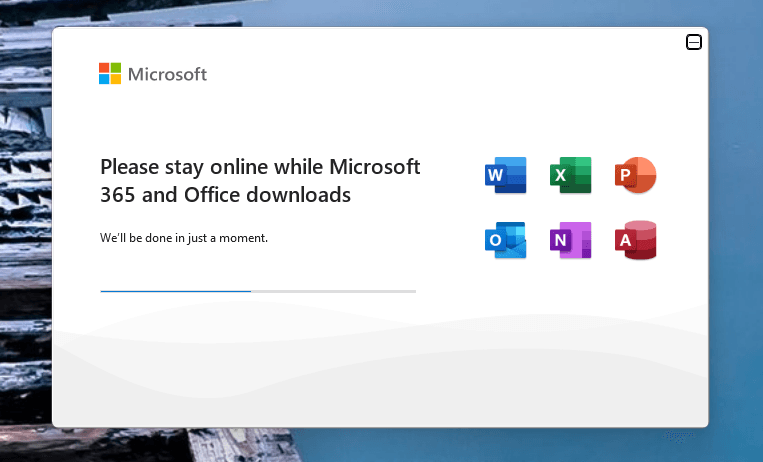
Step 6: Close the Installer
Click Close.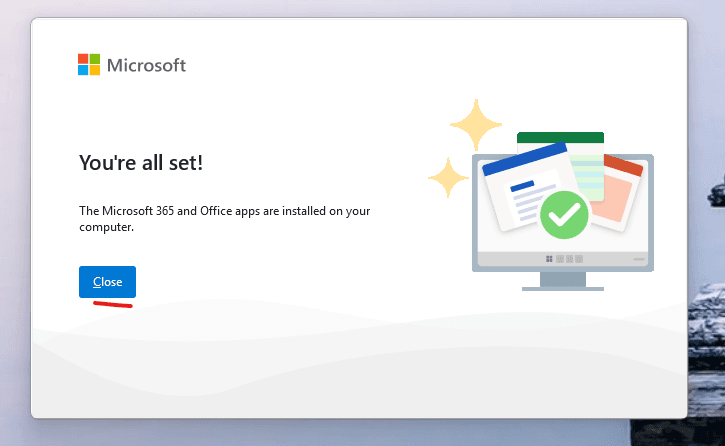
Step 7: Open Word
Go to the Start Menu, type Word, and click the result.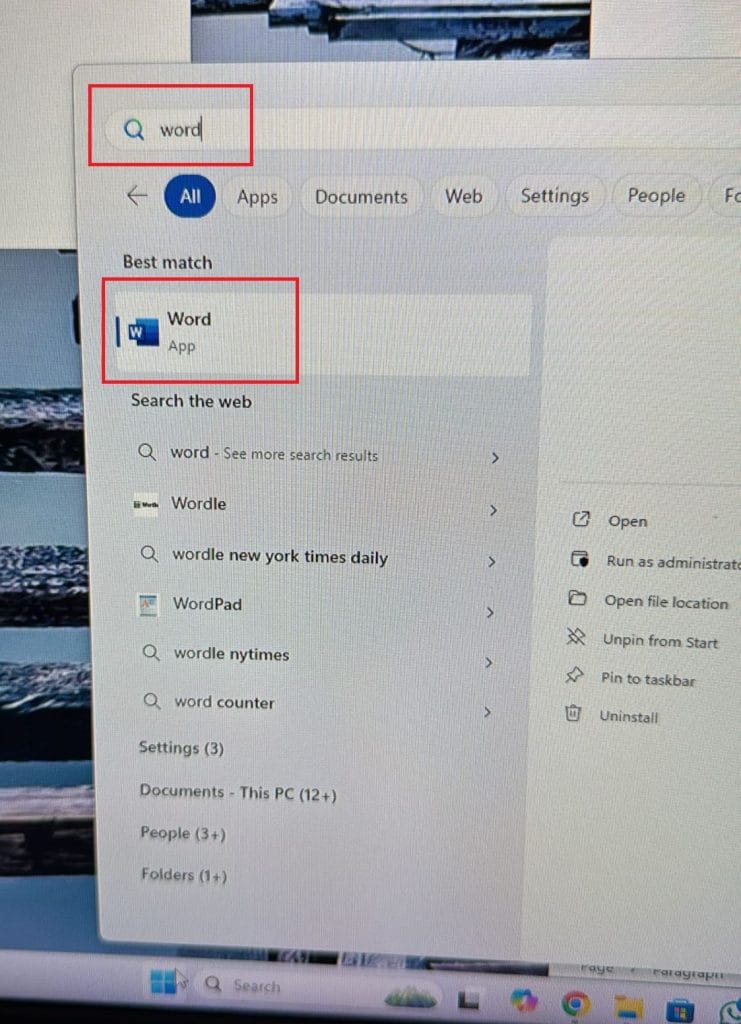
Step 8: Accept License Agreement
Click Accept.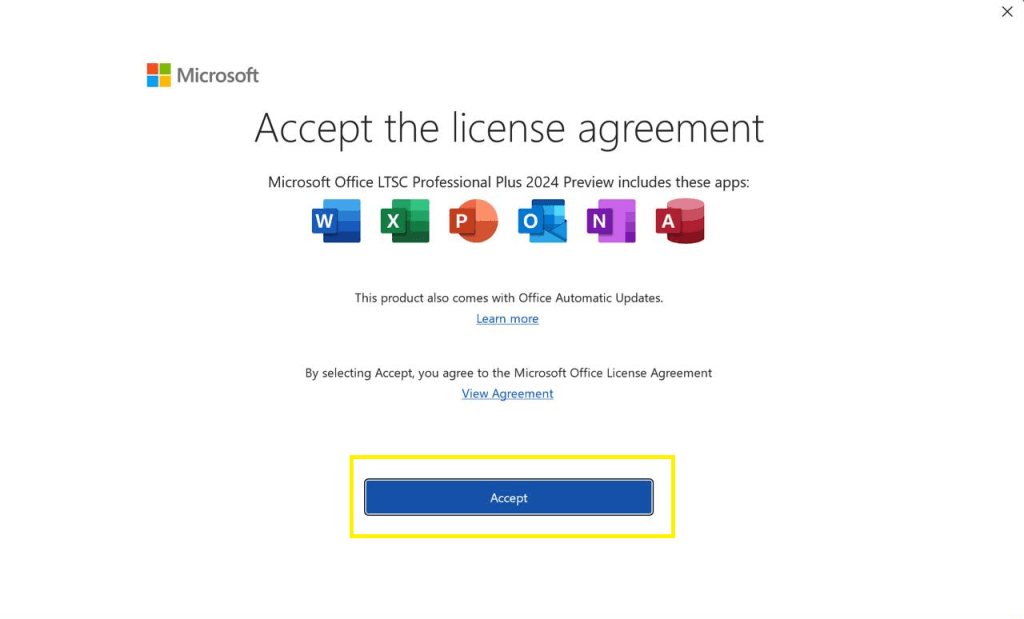
Step 9: Enter Product Key
OFFICE WILL WORK UN-ACTIVATED FOR 30 DAYS AND WILL THEN DEACTIVATE.
THE INSTRUCTIONS BELOW ENSURE OFFICE IS ACTIVATED CORRECTLY.
If the Activation Wizard appears, click Change product key.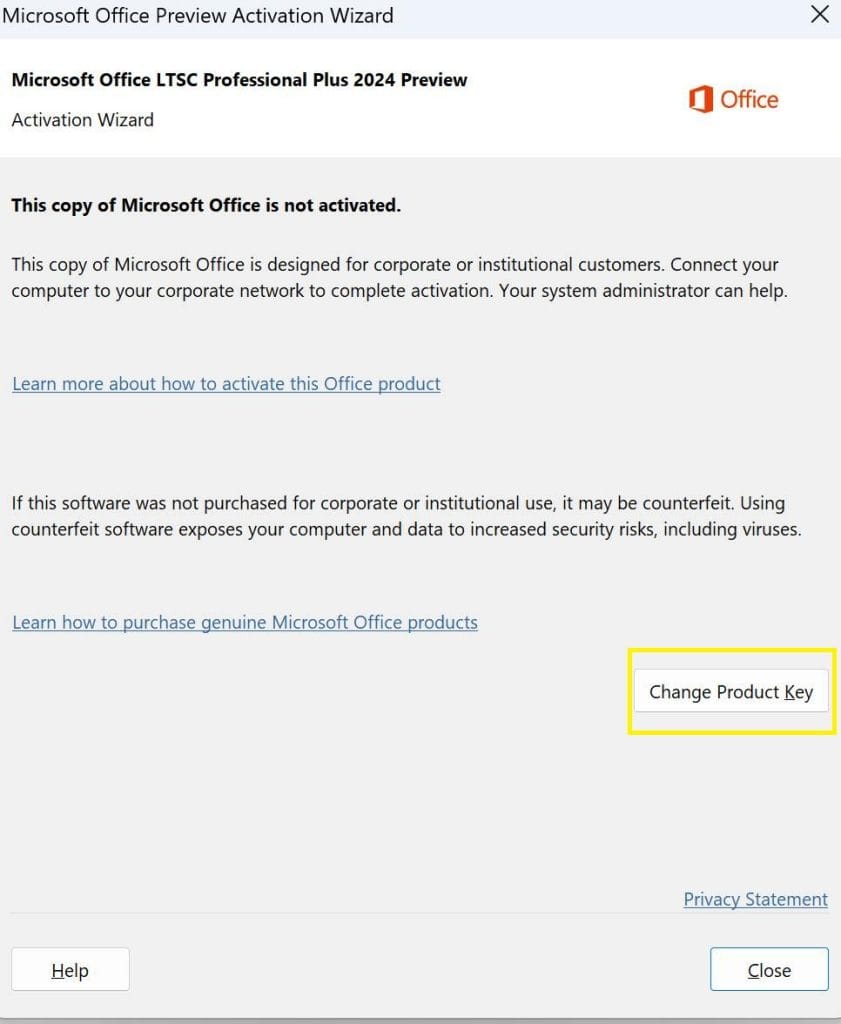
If not, go to Word > Account and click Change Product Key.
Step 10: Activate Office
Enter the product key (sent by email), then click Activate Office.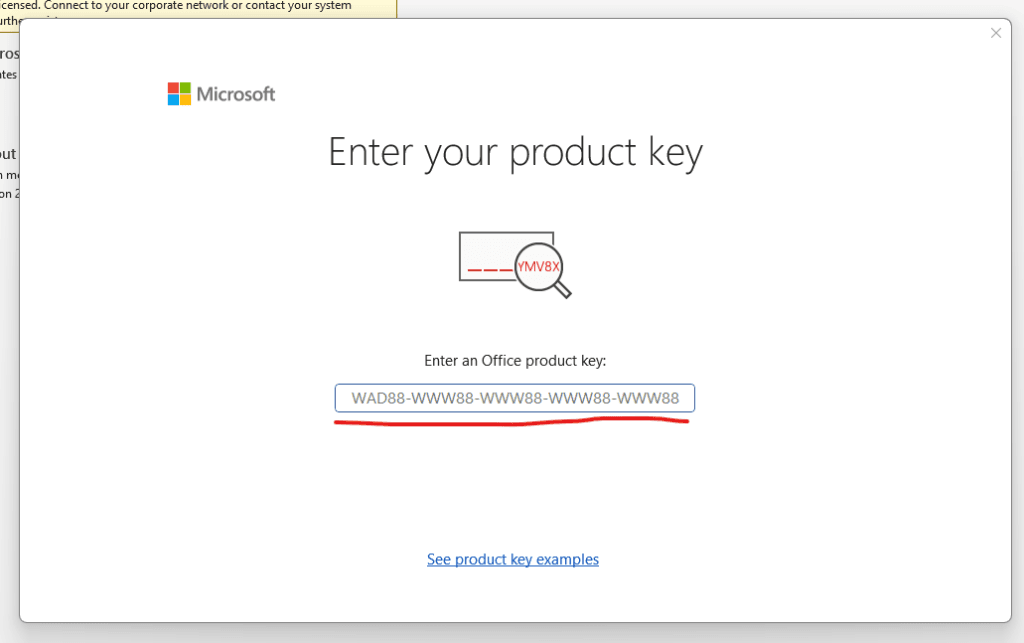

Step 11: Final Check
If prompted, keep clicking Next until activation finishes.
Go back to the Account screen to confirm it says Product Activated.
If it doesn’t, re-enter the product key. Office will deactivate in 30 days if not activated.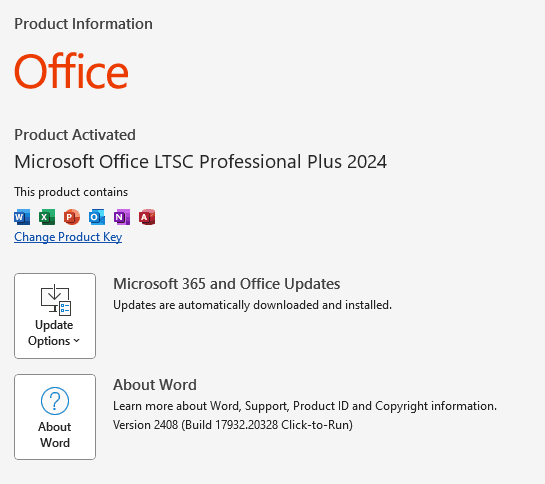
If you see an error or Office doesn’t activate online, select “I want to activate the software by telephone” in the Activation Wizard.
Then go to https://uk.getrenewedtech.com/activate/ and follow the instructions to complete activation quickly using your Installation ID.
✅ You’re Done!
Office 2024 is now installed and activated — ready to use!